One of my 2016 goals was to blog more. So here I am! Blogging more for my business has been a huge hurdle for me. Mostly because I don’t feel qualified to be a “blogger” (I spelled “marriage” wrong on the first round of our wedding invitations, for heaven’s sake!) I don’t write with big, fancy words, or have creative ways to say the thoughts in my head…my writing style is more conversational and less fluff. My non-photography posts will be focused around my DIY life as well as the trials + tribulations of motherhood. For this business of mine to grow, blogging consistently is just something I need to get over and dive into!! So from here on out, it’s my goal to blog 3x a week (MWF) and now since I’ve written it + put it out into the universe, it has to come true, right??
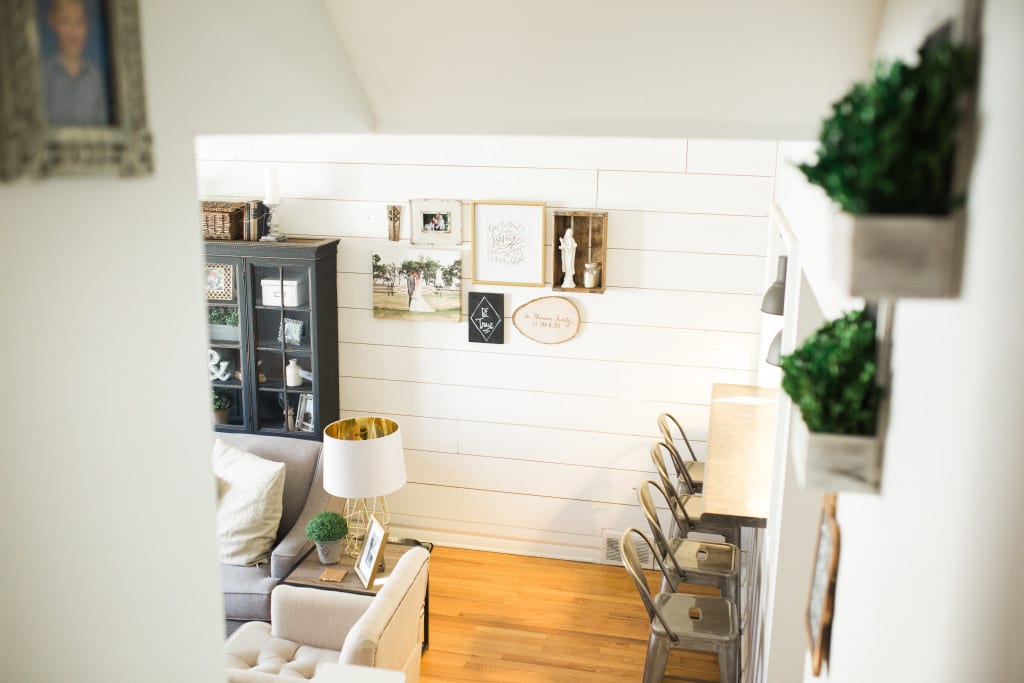
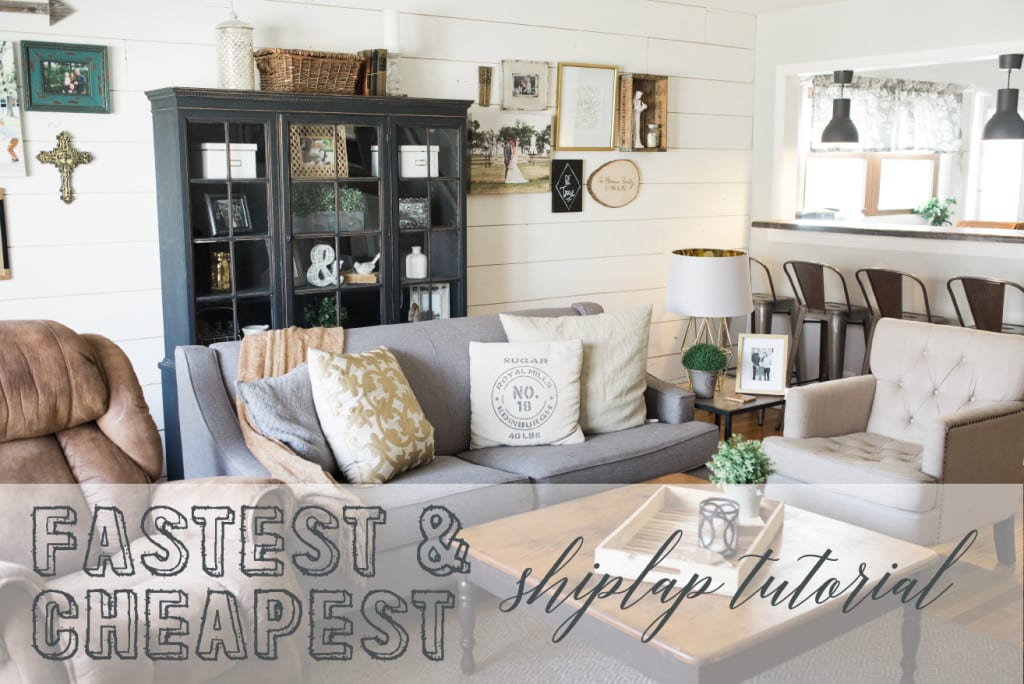
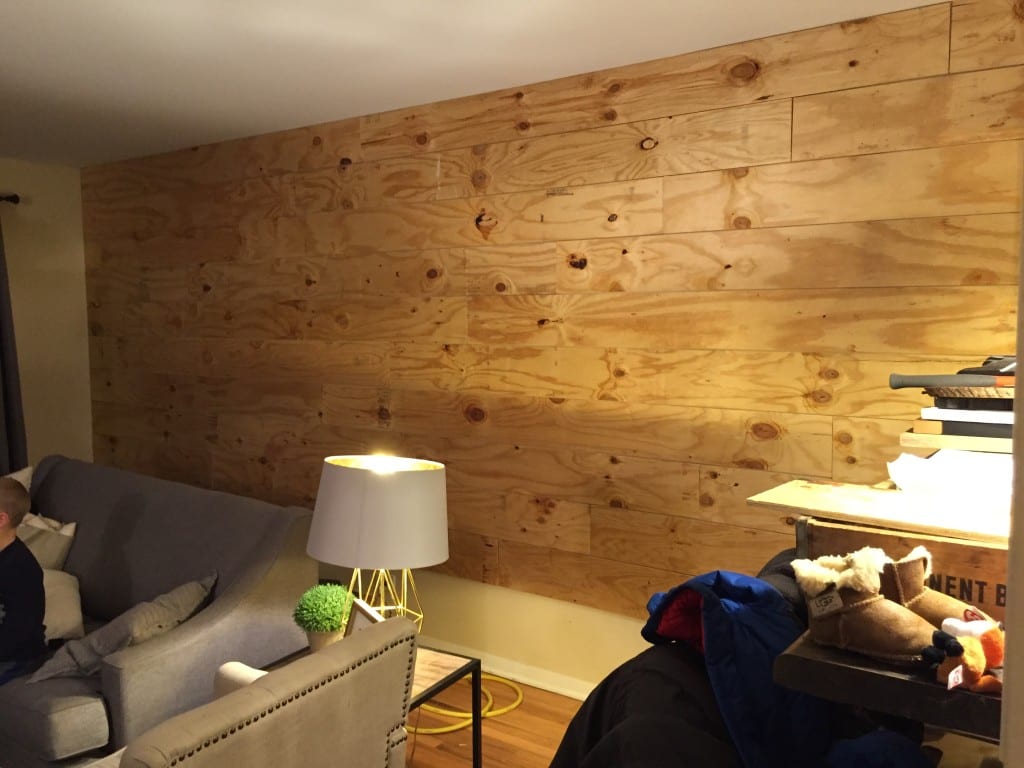
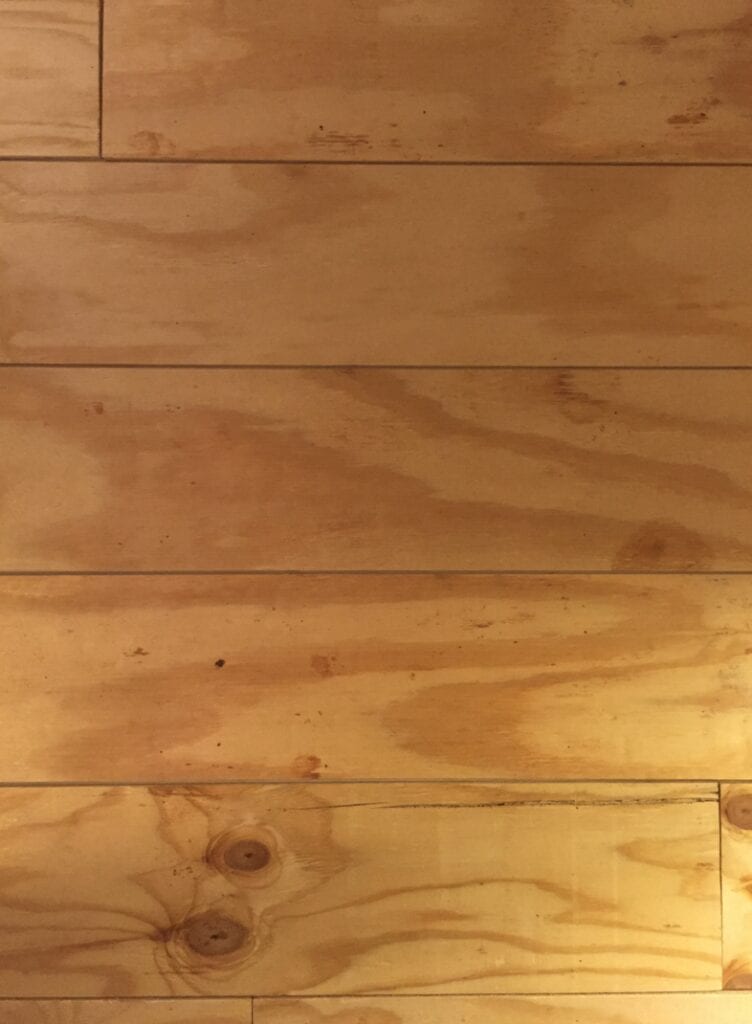
So without further ado, the first official non-photography blog post — my shiplap tutorial! This blogging epiphany has come at the perfect time because we are officially closing on our house on April 1st (we rented to own) and now that we know were officially staying, we are able to finally do the updates I’ve been dreaming of. First up was of course the shiplap! You guys, this was seriously the easiest project ever. It took the hubby and I under 1.5 hours to get it all up! I scoured through pinterest for the best shiplap tutorials and tweaked them to my liking. I wanted the cheapest most efficient way to shiplap and this is what I came up with! Now, I should mention, I DID prefer the imperfect, rugged look of the shiplap — so going with the cheap plywood was a no-brainer because the wood was just that. SO if you want a perfect, smooth ship lap wall, this is probably not the tutorial for you! But if you like the way the picture above looks, read on ;)
(And please excuse the iPhone photos!)
This is what you’ll need:
- 4’x8’x1/4″ plywood underlayment cut down to 8″ planks (I liked the thick plank look, and that also meant less work!) These were $13/sheet at Home Depot and we used about 4.5 sheets for our 180″x90″ wall. I had them cut 6 sheets just in case so we didn’t have to make a trip back and any extras I will use on the boy’s room accent wall!
- Nail Gun + compressor + 2″ nails (this was a GAME changer for us! We cruised through this wall soley because of this tool. The nail gun was $60 and thankfully my mother-in-law had a compressor we borrowed. If you don’t want to buy this stuff, just rent the tools from home depot — its SO worth it compared to hammering every. single. nail.
- Stud Finder
- Nickels (yes, you read that right — these will be used as spacers between planks!)
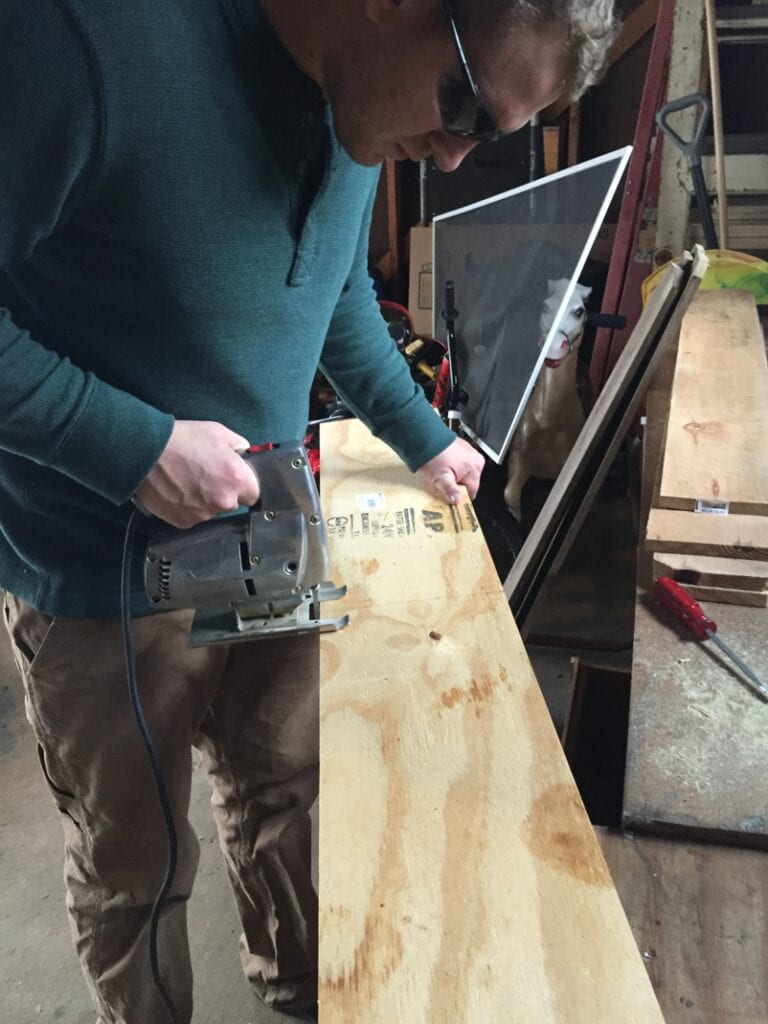
- Jigsaw, table saw, or circular saw
- TWO people minimum (cue slow clap for Sean for helping with this masterpiece)
Directions:
So let me preface this and say, as a self-proclaimed professional DIY-er, I like to do things in the most efficient way possible and skip an steps I don’t deem necessary — saving me time + money. So I will explain the stuff I skipped compared to other tutorials I read and why I skipped them. Wasting time is one of my biggest pet peeves, so if you’re like me — you’ll love these tips — BUT if you’re more cautious and like to do things by the book, that’s ok and I’ll list the extra steps as well! And here we goooo!
- Prime your walls. I skipped this step because we had the dreaded light yellowish-tan color on the walls and I thought I could get away with not noticing the color underneath in the tiny spaces between the planks (and I was right you can’t tell at all –the planks create a dark natural shadow that I love anyways). BUT if you do have a dark color on your wall prior to planking, I suggest priming the walls so the color doesn’t pop through.
- Find the studs with the stud finder. I drew a vertical pencil line on each stud so when we came across it with the plank we knew where to shoot each nail. (If you don’t know what a stud is: A wall stud is a vertical framing member in a building’s wall of smaller cross section than a post. They are a fundamental element in building framing. — definitely not my definition, thanks wikipedia!! But you need to hammer the nails into these instead of drywall because it will be more secure this way.)
- Now its time for planking! First take a leveler to your ceiling to ensure its straight! (If its not, start your planking with a leveler and add crown molding to the top to cover the small gap between the ceiling and first plank row) If you don’t do this and your ceiling is not level, your whole planked wall will be slightly crooked! Start from the top left corner of the wall with your first plank. Nail at each stud you come across. Add plank after plank until you reach the end of the wall. When there isn’t enough room for a full plank, stop and measure the remaining space.
- Cut the measurement (allow an extra 1/8-1/4 inch of leway) with your jigsaw from another plank. Then return to the wall and nail it up. And boom! You just did your first row!
- Take the remaining wood for the plank you just cut and START the next row with this piece. This will ensure the wood pieces don’t start and stop in the same places in each row.
- To space the next row from the previous, take your nickels and place between the two rows on either end. (I stacked 2 on each end because I preferred the wider space between rows)
- Nail into studs and repeat the previous steps until you get to the very last row.
 8. Chances are you will have outlets, vents, and not an row large enough to fit a full plank. So for this I have the following advice: for the outlets and vents I made paper replicas of the shapes and then traced them on the plank in the exact measured spot it would need to be. Then I drilled large holes in the four corners of the traced rectangles so my jigsaw could have a starting point and could turn around the corners (I hope that makes sense?!). And for my leftover space on the wall, it was the width of a baseboard so I went back to Home Depot and got a cheap wood trim and used that for the remaining row. It doesn’t look perfect but then again no one’s really looking at the bottom of the wall! And if you want a more official finish, and have a larger space then just a baseboards width, I suggest going back to Home Depot and having them cut your planks to the remaining width.
 - For painting: But you can fill each nail hole with spackle and then sand down. (This step I skipped because I wanted the rugged look AND it also meant less work for me!) I did read that this was the most tedious, worst part of the wall because there are so many nail holes. So thats all I needed to read to decide, “NOPE!”
- Prime your wood wall. (I also skipped this step because two coats of paint worked just fine!)
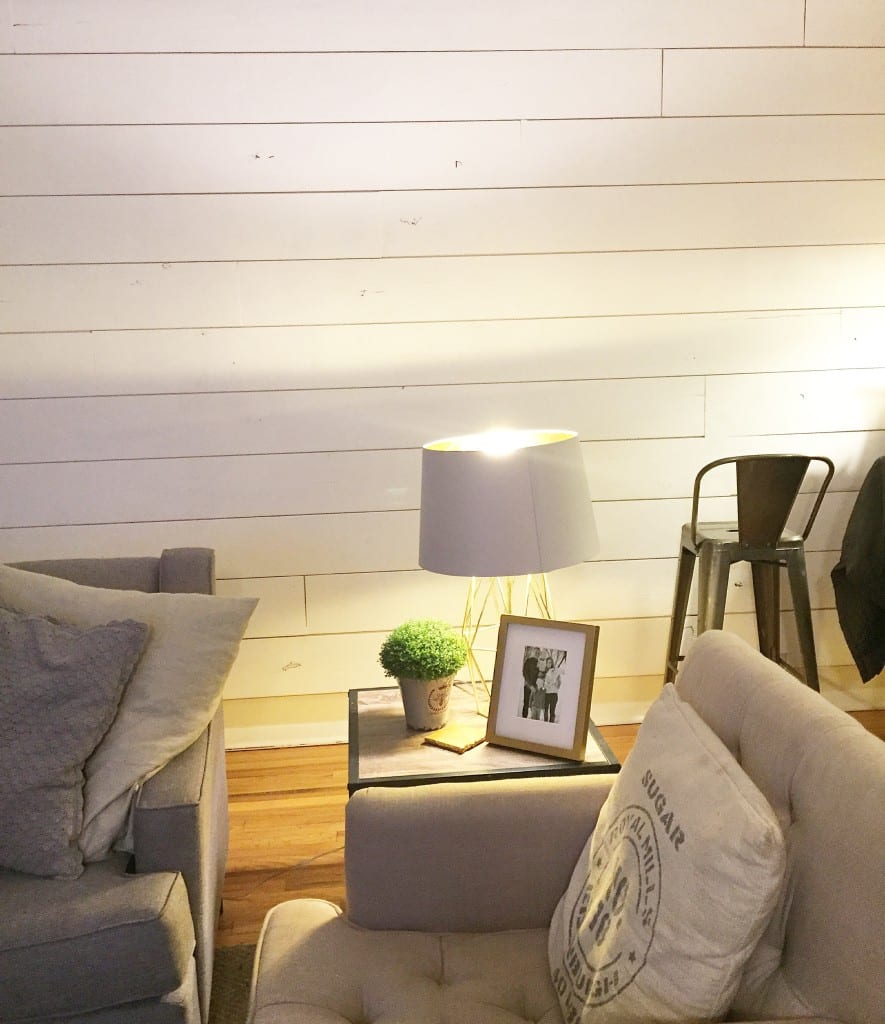
- Paint your wall. I used Benjamin Moore’s color of the year, Simply White and it is perfection. So I highly suggest that for the farmhouse look! But I’ve also seen colored shiplap walls on Pinterest and they look amazing as well!!
And there you have it!!! Hope this was helpful! I’d love to see your final products if you take on this project!! And stay tuned on Wednesday for photos of this room all finished, included links of where all the furniture and decor is from!